Учимся рисовать в графическом редакторе inkscape
Содержание:
- Regression fixes
- Editing paths
- Линейки разметки
- В стадии разработки
- Known issues
- Дублирование, выравнивание и распределение объектов
- Заливки и обводки
- Заливка и обводка
- File format support
- Как набрать знак евро
- Скачайте Inkscape на русском языке бесплатно для Windows
- Draw Freely.
- Series Information
- Extensions
- Other User Interface
- Documentation
- Создание текста
- Crash fixes
- Сочетания Alt + Num — как ввести символы, которых нет на клавиатуре
- Extensions
- Способ интерполяции
Regression fixes
- Potentially missing command line output in Inkscape 0.92.2 on Windows 7. (Bug # 1714278 )
- Extensions in the ‘Raster’ submenu relying on ImageMagick were broken and caused crashes in Inkscape 0.92.2 on Windows. (Bug # 1720330 )
- gcodetools were creating wrong orientation points since the dpi change had been made for Inkscape 0.92 (Bug # 1680760 )
- The ‘Clone original’ path effect that was partially broken in Inkscape 0.92.2 works again to fill a path with a PowerStroke applied to it (useful for drawing cartoons) (Bug # 1715433 )
- The preferences dialog was tiny by default (Bug # 1360213 )
- Node handles no longer get too large when selected, and they also revert back to standard size when deselected (Bug # 1568644 )
- Export to .odg (Open Document Drawing) works again on Windows (Bug # 1654034 )
- Inkscape no longer freezes when trying to import clipart from OpenClipart when the openclipart.org server takes too long to respond to requests (Bug # 1745521 )
- Texts that are written in vertical direction now have their marks (e.g. accents) on the correct side again ( gitlab commit )
Editing paths
Unlike shapes created by shape tools, the Pen and Pencil tools create what is called
paths. A path is a sequence of straight line segments and/or
Bezier curves which, as any other Inkscape object, may have arbitrary fill and stroke
properties. But unlike a shape, a path can be edited by freely dragging any of its nodes
(not just predefined handles) or by directly dragging a segment of the path. Select this
path and switch to the Node tool (F2):
You will see a number of gray square nodes on the path. These
nodes can be selected by click,
Shift+click, or by dragging a rubberband —
exactly like objects are selected by the Selector tool. You can also click a
path segment to automatically select the adjacent nodes. Selected nodes become
highlighted and show their node handles — one or two
small circles connected to each selected node by straight lines. The ! key
inverts node selection in the current subpath(s) (i.e. subpaths with at least one
selected node); Alt+! inverts in the entire path.
Paths are edited by dragging their nodes, node handles, or directly
dragging a path segment. (Try to drag some nodes, handles, and path segments of the
above path.) Ctrl works as usual to restrict movement and rotation. The arrow
keys, Tab, , , <, > keys with their modifiers all work just as they do in selector,
but apply to nodes instead of objects. You can add nodes anywhere on a path by
either double clicking or by Ctrl+Alt+click at the desired location.
You can delete nodes with Del or Ctrl+Alt+click. When
deleting nodes it will try to retain the shape of the path, if you desire for the
handles of the adjacent nodes to be retracted (not retaining the shape) you can
delete with Ctrl+Del. Additionally, you can duplicate (Shift+D)
selected nodes. The path can be broken (Shift+B) at the selected nodes, or if you
select two endnodes on one path, you can join them (Shift+J).
A node can be made cusp (Shift+C), which means
its two handles can move independently at any angle to each other;
smooth (Shift+S), which means its handles are
always on the same straight line (collinear); symmetric
(Shift+Y), which is the same as smooth, but the handles also have the
same length; and auto-smooth (Shift+A), a special
node that automatically adjusts the handles of the node and surrounding auto-smooth nodes
to maintain a smooth curve. When you switch the type of node, you can preserve the position
of one of the two handles by hovering your mouse over it, so that only the other handle is
rotated/scaled to match.
Also, you can retract a node’s handle altogether by
Ctrl+clicking on it. If two adjacent nodes have their handles
retracted, the path segment between them is a straight line. To pull out the retracted
node, Shift+drag away from the node.
Линейки разметки
Линейка разметки расположена вверху и слева холста inkscape. Деления линейки разметки определяют расстояния в некоторых единицах, по умолчанию в пикселях. Изменить настройку единиц измерения можно в свойствах документа в меню «файл» — «Свойства документа».
Когда указатель мыши находится над холстом, на линейке появляются два черных треугольника, треугольника, которые отображают на линейке координаты курсора относительно в нижнего левого угла страницы. Эти координаты X и Y можно увидеть в строке состояния (в нижнем правом углу окна программы), рядом с параметром масштаба Z.
Обратите внимание на то, что SVG координаты начинаются в нижнем левом углу документа как обычно принято геометрии в декартовой системе координат.
Комбинация клавиш CTRL + R позволяет скрыть или отобразить линейки разметки inkscape. Также это можно сделать в главном меню «Вид» — «Показать или скрыть» — «Линейки».
В стадии разработки
Known issues
- 0.92.5 is not as feature-packed as Inkscape 1.0 will be!
- 0.92.5 is not availabe for macOS. Please use the latest beta version of Inkscape 1.0, if you want a newer Inkscape that integrates better with macOS and works with high resolution screens. Catalina users must use the beta version, because Inkscape 0.92.2 will not run on macOS Catalina (Inkscape 0.92.2 is 32bit only).
- Many of Inkscape’s old bug reports still need to be tested and migrated to the new bug and feature request reporting page. While some progress has already been made, we still need your help with that task.
- All (migrated and new) open issues for the project are listed on GitLab. If you have some time on your hands and can help fixing them, join us in the development chat and let us tackle them together.
Дублирование, выравнивание и распределение объектов
Одна из наиболее часто используемых и необходимых операций — это дублирование объекта — комбинация клавиш Ctrl+D. Дубликат помещается точно над оригинала. При необходимости дубликат можно перетащить мышью или стрелочками клавиатуры в другое место. Для практики нарисуйте узкий прямоугольник и попробуйте составить из его копий квадрат, как на рисунке слева.
Скорее всего, точно выровнять прямоугольники у вас не получится или это потребует от вас значительных усилий. Но здесь на помощь вам придет диалоговое окно «Выровнять и расставить». Активировать его можно по комбинации клавиш Ctrl+Shift+A или из главного меню «Объект» предпоследний снизу пункт. Как им пользоваться. Выберите все нарисованные вами фигуры, точнее фигуру и все ее копии. Выделять фигуры мы уже научились в начале этого урока. Скорее всего оптимальным способом выделения будет в данном случае выделение рамкой. Откройте диалоговое окно «Выровнять и расставить» и нажмите на кнопку «Центрировать по горизонтальной оси», а затем кнопку «Переместить объекты так, что бы их рамки едва не пересекались». Если навести указатель мыши на кнопку, то в подсказке будет отражено название этой кнопки. Объекты будут расставлены аккуратно друг за другом. Вот некоторые примеры выравнивания и распределения:

Термин Z порядка (порядок по вертикали) относится к порядку наложения объектов в документе. То есть если какие-то объекты находятся выше других, то они должны перекрывать находящиеся ниже объекты. В главном меню «Объект» есть две команды «поднять на передний план» — клавиша Home и «Опустить на задний план» — клавиша End. С помощью этих команд можно поднимать и опускать объекты текущего слоя. Две другие команды «Поднять» Page Up и «Опустить» Page Down, будет действовать только на один один шаг, т.е. изменят порядок только одного объекта на один уровень в Z порядке. Выполняя эти действия несколько раз можно перемещать объекты последовательно от самого верхнего уровня до самого нижнего соответственно.
Попробуйте нарисовать несколько объектов и поэкспериментируйте с порядком их наложения, как мы это сделали на примере ниже:
Очень полезной будет в этом случае клавиша Tab которая позволяет выделять объекты по очереди Z порядка. Если изначально не был выбран ни один объект, то нажатие этой клавиши выделит самый нижний объект, в противном случае она выбирает объект на уровень выше выбранных объектов в Z порядке. Комбинация клавиш Shift+Tab работает в обратном порядке, начиная с верхнего объекта и переходя вниз. Изначально Z порядок расставляется по мере создания вами объектов, т.е. вверху находится последний созданный объект. В этом случае, если ни один из объектов не выбран, то нажав Shift+Tab очень удобно выбирать первые созданные объекты.
Заливки и обводки
Доступ ко многим функциям inkscape реализован через диалоговые окна. Наверное самым простым способ покрасить объект в разные цвета будет открыть активировать его и выбрать цвет на палитре цветов.
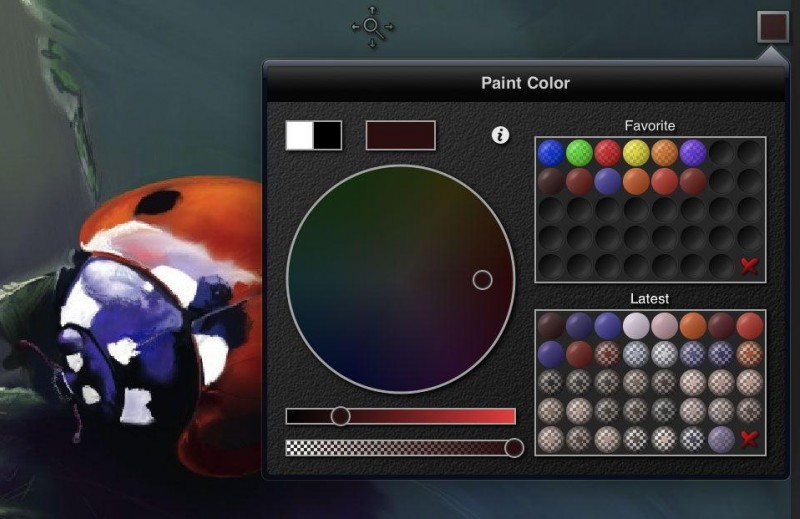
Но более мощный инструмент управления цветами объекта находится в диалоге заливки и обводки. Этот диалог доступен в верхнем пункте главного меню «Объект» или по комбинации клавиш Shift+Ctrl+F. Выберите какой-нибудь объект, например, эллипс, как на рисунке ниже, и откройте диалоговое окно заливки и обводки.
Вы увидите, что диалоговое окно имеет три вкладки: «заливка», «обводка» и «стиль обводки». Закладка «Заливка» позволяет редактировать заливку выбранных объектов. С помощью кнопок сразу под названием закладки, можно выбрать типы заливки, включая и первый пункт «нет заливки» (кнопка с крестиком), сплошной цвет заливки, а также линейные и радиальные градиенты. Для рисунка выше была активирована вторая кнопка сплошной заливки.
Ниже кнопок с видами заливки на закладке «Заливка» вы увидите варианты выбора цвета. Для каждого способа выбора цвета есть своя собственная вкладка: RGB, CMYK, HSL и «Круг». Довольно удобно выбирать цвет на закладке «Круг», где вы можете повернуть треугольник внутри круга, чтобы выбрать цвет на цветовом круге, а затем выберите оттенок этого цвета в треугольнике. Для всех цветов изменять прозрачность можно с помощью ползунка «Альфа-канала» (прозрачность). Прозрачность измеряется в % непрозрачности, т.е. 100% абсолютно непрозрачный цвет и, наоборот, 0% абсолютно прозрачный.
Всякий раз, когда вы выбираете объект, цвет в описанном выше диалоговом окне обновляется, показывая цвет текущей заливки и обводки. Если выбрано несколько объектов, диалоговое окно показывает их средний цвет. Поэкспериментируйте с этим диалоговым окном. Теперь вы можете создавать разноцветные фигуры и даже полупрозрачные.
На закладке «Обводка», можно сделать обводку объекта без заливки или сделать заливку сплошного цвета и настроить ее прозрачность:
Последняя закладка в этом диалоговом окне «стиль обводки», позволяет задать ширину, тип линии обводки и другие параметры обводки объекта:
Ну, и, наконец, вместо того, чтобы заливать фигуры сплошным цветом, можно использовать градиенты для заливки или обводки:
При переходе от сплошной заливки цветом к градиенту создается настройка градиента, для идентификации которой программа присваивает настройке номер.
Только что созданная настройка градиента использует предыдущий цвет сплошной заливки фигуры, который переходит из непрозрачного цвета в прозрачный. Для управлении градиентом заливки фигуры активируйте инструмент градиент в боковом окне инструментов или нажмите Ctrl+F1. Появятся две направляющие градиента в заливке фигуры. Перемещаете направляющие (ручки) градиента и вы увидите как он изменяется. Направляющие градиента в зависимости от их длины изменяют насыщенность и форму градиента. Так изменяя длину ручек (направляющих) градиента можно из кругового градиента сделать овальный и т.д. Цвет градиента можно менять в палитре цветов inkscape или в диалоговом окне по кнопке «изменить». У градиента есть два цвета, цвет ручки и цвет центрального маркера. Если нажать на центральный маркер, то в диалоговом окне отобразится его цвет и прозрачность и их можно поменять и то же самое можно сделать для цвета ручки. Для этого надо активировать маркер любой из двух ручек градиента.
Еще один достаточно удобный способ изменить цвет объекта — это воспользоваться инструментом «Пипетка» в боковом окне инструментов или F7. Просто щелкните в то место рисунка, где уже есть нужный вам цвет и этот цвет будет присвоено заливке выбранного объекта. Щелчок пипеткой с нажатой клавишей Shift назначит выбранный цвет цвету обводки.
Заливка и обводка
Probably the simplest way to paint an object some color is to select an
object, and click a swatch (color field) in the palette
below the canvas to paint it (change its fill color).
Alternatively, you can open the Swatches dialog from the
View menu (or press Shift+Ctrl+W), select the
palette that you want to use after clicking on the little triangle in its top
right corner, select an object, and click any swatch to fill the object (change
its fill color).
More powerful is the Fill and Stroke dialog from the
Object menu (or press Shift+Ctrl+F). Select the shape
below and open the Fill and Stroke dialog.
You will see that the dialog has three tabs: Fill, Stroke paint, and
Stroke style. The Fill tab lets you edit the fill (interior) of the selected
object(s). Using the buttons just below the tab, you can select types of fill,
including no fill (the button with the X), flat color fill, as well as linear or
radial gradients. For the above shape, the flat fill button will be
activated.
Further below, you see a collection of color
pickers, each in its own tab: RGB, CMYK, HSL, and Wheel. Perhaps the
most convenient is the Wheel picker, where you can rotate the triangle to choose
a hue on the wheel, and then select a shade of that hue within the triangle. All
color pickers contain a slider labelled “A“ to set the
alpha (opacity) of the selected color.
Каждый раз при выборе объекта вкладка «Заливка и обводка…» показывает текущее значение для данного объекта (для нескольких одновременно выбранных объектов, вкладка цвета показывает их усреднённый цвет). Экспериментируйте на этих примерах:
Используя вкладку «Обводка», вы можете убрать обводку объекта, установить его цвет или прозрачность:
Последняя вкладка «Стиль обводки» позволит вам изменить толщину и другие параметры обводки:
Finally, instead of a flat color, you can use
gradients for fills and/or strokes:
When you switch from flat color to gradient, the newly created gradient
uses the previous flat color, going from opaque to transparent. Switch to the
Gradient tool (Ctrl+F1 or just
G) to drag the gradient handles —
the controls connected by lines that define the direction and length of the
gradient. When any of the gradient handles is selected (highlighted blue), the
Fill and Stroke dialog sets (and displays) the color of that handle instead of
the color of the entire selected object.
Yet another convenient way to change the color of an object is by using
the Dropper tool (F7 or D). Just click anywhere in the drawing with that tool, and the
color you clicked on will be assigned to the selected object’s fill
(Shift+click will assign the stroke
color).
File format support
- New Flash XML Graphics (FXG) export format.
- New Synfig Animation Studio (SIF) export format.
- New HTML5 Canvas export format
- New Visio (VSD) import format, based on libvisio .
- New internal CorelDraw (CDR) import format, based on libcdr .
- XAML export improvements (including a new Silverlight compatible mode).
- Compressed SVG and media export extension improvements. New options:
- set an image directory in the zip file
- add a text file that lists the fonts used in the SVG document.
- New preference to allow users to always link, embed or ask when importing bitmaps.
- New preferences that allow the checking of SVG on input and/or export for invalid or not useful elements, attributes, and properties. Options control whether such items generate warnings (when Inkscape is run from the command line) or in removing such items.
- The option now works with Plain SVG export.
EMF/WMF
EMF and WMF input and output filters have been completely rewritten and are now cross-platform. It is now possible to copy and paste EMF files between Windows applications running in Wine and a native Linux version of Inkscape.
Gimp XCF
- The Save Background option allows users to choose if the page background is saved with each GIMP layer.
- The exported layers now use the attribute or, if not set, the attribute
- New Resolution option
- New Help tab
- Some bugs and warnings fixed
Bleed/margin: Added an option to specify an extra margin by which the bounding box to be exported is expanded. This may be helpful to export a PDF with a small white margin around the drawing, or for exporting a bleed region a few mm outside the area of the page.
PDF/EPS/PS + LaTeX
- Added the possibility of scaling the image. The package must be included in the preamble. Then the image can be scaled by defining instead of .
- The font shape is now also exported. for italic text, for bold text, and (slanted) for oblique text. It is important to note that Arial has an oblique font shape, not italic . Thus, the result in LaTeX will be slanted , instead of italic . It is better to use another font in Inkscape when you want true italics.
Как набрать знак евро
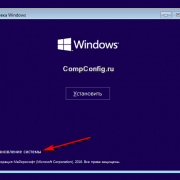
Скачайте Inkscape на русском языке бесплатно для Windows
| Версия | Платформа | Язык | Размер | Формат | Загрузка |
|---|---|---|---|---|---|
|
Inkscape 0.92.2 |
Windows |
Русский | 53.9MB | .exe |
Скачать |
|
Inkscape 0.91.1 |
MAC | Русский | 73.5MB | .dmg |
Скачать |
Обзор Inkscape
Inkscape (Инкскейп) – распространяемый бесплатно векторный графический редактор, предназначенный для создания и обработки иллюстраций. С помощью программы можно создавать статические иллюстрации, анимации, карты, схемы, диаграммы, чертежи и т.д.
Основные возможности
К особенностям Inkscape относятся:
- • Собственный формат документов, который использует возможности языка разметки svg и предусматривает сохранение и работу со сжатыми документами благодаря алгоритму декомпрессии gzip;
- • Поддержка импорта и экспорта различных форматов файлов, включая svg, pdf, png, ai, dia и другие; возможности программы позволяют одновременно редактировать только одну страницу pdf-документа;
- • Встроенный векторизатор, предназначенный для обработки изображений, созданных в растровых редакторах;
- • Большое количество поддерживаемых горячих клавиш, возможность программирования новых сочетаний;
- • Редактирование параметров и изменение численных значений через панель свойств;
- • Статусная строка, в которой отображаются данные о выделенных объектах;
- • Редактор xml-кода открытого файла с древовидной структурой отображения компонентов обеспечивает доступ ко всем параметрам документа;
- • Инструменты для рисования и обработки изображений, функционал которых не уступает возможностям мощных графических пакетов;
- • Использование внешних модулей для работы с формулами через LaTex и построения графиков в PSTricks.
Кроме двумерных фигур и прочих стандартных инструментов, для создания и редактирования графических документов пользователь может применять различные дополнительные инструменты:
- • Параллелепипед для отображения этого геометрического тела в перспективе;
- • Заливка, с помощью которой создается контур определенного цвета в заданной области;
- • Корректор предназначается для редактирования формы и цвета выделенного контура;
- • Ластик используется для удаления объектов или отдельных компонентов внутри них;
- • Аэрограф распределяет копии заданного объекта по выделенной области;
- • Каллиграфическое перо, которое реагирует на силу нажатия и угол наклона стилуса при рисовании на графических планшетах.
Inkscape применяется при создании логотипов и презентаций, баннеров и макетов сайтов, игровой графики. Благодаря русифицированному интерфейсу, разобраться в программе достаточно просто. Последняя версия Inkscape 0.92.2 вышла летом 2017 года.
Скриншоты
Похожие программы
AutoCAD — система автоматизированного проектирования от Autodesk
CorelDRAW — программа для работы с векторной графикой
Adobe Photoshop CC
Blender
Adobe Photoshop — графический редактор, для обработки фотографий
GIMP — бесплатный графический редактор
Paint.NET — бесплатный инструмент для работы с растровой графикой
SketchUp — программа для создания несложных трехмерных моделей
Picasa — просматривайте, редактируйте и организовывайте изображения
FastStone Image Viewer
Sweet Home 3D
XnView
Krita
Adobe Illustrator
ArchiCAD
CINEMA 4D
Adobe InDesign
ACDSee — утилита для просмотра изображений на компьютере
Autodesk 3ds Max
Paint Tool SAI — графический редактор для цифрового рисования
Inkscape
Photoscape — программа, предназначенная для работы с растровой графикой
IrfanView
Компас-3D
Adobe Photoshop Lightroom
Autodesk Maya
Autodesk Inventor
SolidWorks
Autodesk Revit
NanoCAD
Fusion
Anime Studio Pro
Аудио | Видео программы
Графические программы
Microsoft Office
Игры
Интернет программы
Диски и Файлы
Draw Freely.
Series Information
Extensions
Units: Breaking change
Due to the implementation of proper document units, the functions and had to be modified and moved to the class.
Unit conversion calls should be replaced with and calls (usually and ).
See also: Notes On Units Handling in Extensions in 0.91
New
- The new guillotine extension is used for exporting PNG slices from a drawing. The slice rectangles are defined by adding horizontal and vertical guides within the canvas boundary, the canvas boundary serves as the outside of the sliced area.
- The new G-code tools extension converts paths to G-code (using circular interpolation), makes offset paths and engraves sharp corners using cone cutters.
- New QR code generator.
- New isometric grid generator .
- New bitmap crop extension.
- New Extract text extension. Outputs a document’s text elements in a chosen order.
- New Merge text extension.
- New HSL adjust extension.
- New Replace font extension.
- New N-Up layout extension.
- New Voronoï diagram extension (creates Voronoï diagrams and Delaunay triangulations based on the selected objects’ barycenter).
- New Interpolate Attribute in a group extension.
- New Typography extensions menu.
- New Hershey Text extension.
Improvements
- Number nodes. New parameters allowing users to choose the starting dot number and the numbering step between two nodes.
- Optional sliders added on and extension parameters (full and minimal modes).
- Extension parameters values (”except attributes!”) can now be contextualized for translation (with ).
- New sub-menus in the Render menu, grouping the bar-codes, grids and layout extensions.
Other User Interface
General
- Canvas background color can be set without exporting it (background transparency is only used for export but not the canvas).
- Panning the canvas with the Space bar is now always turned on and doesn’t require an additional mouse button press to grab the canvas: just press the Space bar and move the mouse pointer to pan the canvas.
Guides
- Guides visibility can be toggled by clicking the ruler
-
Guides can now have labels, and the colour of individual guides can also be set by the user. To label or colour a guide, double click on the guideline to bring up the guide properties dialog.
Menu/Access
- The interface elements are accessible through the keyboard with ALT+key in many more dialogs
- “Text and Font”, “Fill and Stroke”, and “Check Spelling” dialogs are added to the text object context menu (right click)
- Menu items renamed:
- Edit -> Preferences
- Edit -> Input Devices
- File -> Cleanup Document
- Checkboxes to indicated status of View -> Grid/Guides/Snap/Color Management
- Group/Ungroup from the context menu
Preferences
- New keyboard shortcut editor
- Prefs -> Interface — New option for dockbar and switcher style (icons, text, icons & text) (bug #1098416)
- Prefs -> Interface -> Windows — optionally don’t save & restore documents viewport (bug #928205)
- Prefs -> Behavior -> Steps — unit selector for steps (move, scale, inset/outset) (bug #170293)
- Prefs -> Behavior -> Steps — option for relative snapping of guideline angles (rev 10307)
- Prefs -> Behavior -> Clones — optionally relink linked offsets on duplication (bug #686193)
- Prefs -> Input/Output -> SVG output — NEW: optionally enforce relative or absolute coordinates (bug #1002230)
Dialogs
- Dialog status and position is remembered between sessions
- Most dialogs now dockable (including “Object properties”, “Object attributes”, “Text and Font”, “Check spelling”, “Export PNG image”, “XML editor”, “Find/Replace”, and “Tiled clones”)
- New preference to allow Windows users to choose between native and Gtk Open/Save dialog
- Preferences dialog cleanup
- Document Metadata dialog merged into Document Properties
Simple calculations in spinboxes
In most spinboxes (a spinbox is an entry field with up and down “spinbuttons” next to it) you can now write simple calculations. Some examples:
- 2 * 3
- 50 + 100 , or
- ((12 + 34) * (5 + 5) — 2) / 2
Moreover, you can use units in entering values, like 2 + 2 cm . The result will be converted to the selected unit for the particular entry.
Configurable Control Handles
New preferences have been added to allow for the size of the on-canvas controls to be increased or decreased. The “Input Devices” section has been updated to control this.
Documentation
Documentation Relaunch
The Inkscape documentation repository, containing the man page, the keyboard shortcut list as well as the tutorials and their respective translation files, has been almost completely refactored (Java has been dropped in favor of Python), and was updated to work with git and gitlab.
Where to find recent documentation
Continuously updated man page (for command line usage), keyboard and mouse shortcut list, tutorials and translation statistics for the various parts of the Inkscape project are available on the inkscape.org website:
- Man page
- Keyboard shortcuts
- Tutorials
- Translation statistics for Inkscape 0.92 series / development branch
Tutorials, as always, are also included with your Inkscape installation.
Contributing to documentation and documentation translation
Contributions to the documentation translations, as well as improvements to its contents, are welcome at the inkscape-docs repository .
Создание текста
Inkscape умеет создавать длинные и сложные тексты, но также прекрасно подходит для создания маленьких текстовых объектов, вроде баннеров, логотипов, диаграмм, этикеток, заголовков и т.п. Этот раздел урока даёт начальные знания о возможностях инструмента для работы с текстом.
Creating a text object is as simple as switching to the Text tool (F8),
clicking somewhere in the document, and typing your text. To change font family, style,
size, and alignment, open the Text and Font dialog (Shift+Ctrl+T). That
dialog also has a text entry tab where you can edit the selected text object — in some
situations, it may be more convenient than editing it right on the canvas (in
particular, that tab supports as-you-type spell checking).
Как и другие инструменты, инструмент Текст может выбирать объекты своего типа — текстовые объекты — поэтому, вы можете щелчком мыши выбрать текстовый объект и, установив курсор, начать изменять текст (например, этот абзац).
One of the most common operations in text design is adjusting spacing between letters
and lines. As always, Inkscape provides keyboard shortcuts for this. When you are
editing text, the Alt+< and Alt+> keys change
the letter spacing in the current line of a text object, so that
the total length of the line changes by 1 pixel at the current zoom (compare to Selector
tool where the same keys do pixel-sized object scaling). As a rule, if the font size in
a text object is larger than the default, it will likely benefit from squeezing letters
a bit tighter than the default. Here’s an example:
Суженный вариант выглядит немного лучше, но по прежнему не идеально: межсимвольное расстояние не одинаково, например буквы «a» и «t» слишком далеки друг от друга, в то время как «t» и «i» слишком близки. Количество подобных изъянов (особенно заметных при больших кеглях шрифта) больше у шрифтов низкого качества, нежели чем у шрифтов высокого качества. Но, честно говоря, в любом тексте с любым шрифтом вы, вероятно, найдёте пары букв, кернинг которых можно было бы улучшить.
Inkscape makes these adjustments really easy. Just move your text editing cursor between
the offending characters and use Alt+arrows to move the letters right
of the cursor. Here is the same heading again, this time with manual adjustments
for visually uniform letter positioning:
In addition to shifting letters horizontally by Alt+Left or
Alt+Right, you can also move them vertically by using
Alt+Up or Alt+Down:
Of course you could just convert your text to path (Shift+Ctrl+C) and
move the letters as regular path objects. However, it is much more convenient to keep
text as text — it remains editable, you can try different fonts without removing
the kerns and spacing, and it takes much less space in the saved file. The only
disadvantage to the “text as text” approach is that you need to have the original font
installed on any system where you want to open that SVG document.
Similar to letter spacing, you can also adjust line spacing in
multi-line text objects. Try the Ctrl+Alt+< and
Ctrl+Alt+> keys on any paragraph in this tutorial to space it in or out
so that the overall height of the text object changes by 1 pixel at the current zoom.
As in Selector, pressing Shift with any spacing or kerning shortcut
produces 10 times greater effect than without Shift.
Crash fixes
Fix a crash …
- … when moving a group after deleting a connector from it (Bug #205)
- … on PNG export (Commit #6cf2c8)
- … in Clone Original LPE (Commit #515569e7)
- … in SIOX foreground tracing (Commit #424477f6)
- … when importing / selecting a large PNG image (Commit #72836e91)
- … on undo when the text dialog is open (Commit #40c7e4f8)
- … for connector tool avoidance functionality (flatpak) (Commit #c4d31185)
- … when selecting all with text on path (Commit #1a07842b)
- … when putting text on path with Objects dialog open (Commit #f5a38658)
- … of the paint bucket tool (flatpak) (Commit #cbeb0db7)
- … on Boolean division (flatpak) (Commit #094d2341)
- … when resizing objects (Commit #5095c1b4)
- … when pressing the menu button with Mate desktop (Bug inbox#400)
- … with empty text and arrow / Enter keys (Commit #f29ffcbb, Commit #decb8fcb, Commit #957032e1)
- … when clicking at the end of a text (Commit #8306201a)
- … when rotating an element with snapping enabled (Bug #1584)
- … on closing Inkscape (Commit #94d345e0)
Сочетания Alt + Num — как ввести символы, которых нет на клавиатуре
Extensions
Units: Breaking change
Due to the implementation of proper document units, the functions and had to be modified and moved to the class.
Unit conversion calls should be replaced with and calls (usually and ).
See also: Notes On Units Handling in Extensions in 0.91
New
- The new guillotine extension is used for exporting PNG slices from a drawing. The slice rectangles are defined by adding horizontal and vertical guides within the canvas boundary, the canvas boundary serves as the outside of the sliced area.
- The new G-code tools extension converts paths to G-code (using circular interpolation), makes offset paths and engraves sharp corners using cone cutters.
- New QR code generator.
- New isometric grid generator .
- New bitmap crop extension.
- New Extract text extension. Outputs a document’s text elements in a chosen order.
- New Merge text extension.
- New HSL adjust extension.
- New Replace font extension.
- New N-Up layout extension.
- New Voronoï diagram extension (creates Voronoï diagrams and Delaunay triangulations based on the selected objects’ barycenter).
- New Interpolate Attribute in a group extension.
- New Typography extensions menu.
- New Hershey Text extension.
Improvements
- Number nodes. New parameters allowing users to choose the starting dot number and the numbering step between two nodes.
- Optional sliders added on and extension parameters (full and minimal modes).
- Extension parameters values (”except attributes!”) can now be contextualized for translation (with ).
- New sub-menus in the Render menu, grouping the bar-codes, grids and layout extensions.
Способ интерполяции
Одним из параметров расширения Интерполяция является Cпособ интерполяции. Есть 2 реализованных способа интерполяции и их различие в том, как они вычисляют кривые для новых объектов. Для использования вы можете выбрать способ интерполяции 1 или 2.
В приведённых выше примерах мы использовали способ интерполяции 2 и в результате получили:
Теперь сравните это с результатом, полученным способом интерполяции 1:
Описание различия способов вычисления данного параметра выходит за границы этого документа, так что проще просто попробовать оба способа и использовать тот, который даёт результат, близкий к необходимому.